
#21DaysOrganizationChallenge
Did you know it takes 21 days to create or change a habit? Many of my followers and clients were not aware of this until I discussed it with them, so to help them and you I created the 21 Day Organization Challenge.
If you have missed any of the challenges in July, no problem, check them out here.
When you complete any of the challenges link up your post or picture or even video to this blog for everyone to see or posts your pictures and videos on social media (Facebook, Instagram, Twitter and Google+)
tagging @decluttrme
and using the hashtag
#21DaysOrganizationChallenge
.
Have fun with the challenge and good luck!

Today is the final day of the #21DaysOrganizationChallenge. How has it been for you? Do you feel lighter, less cluttered and more organised? Please let me know what has worked for you and which areas you found difficult to deal with.
I have loved hearing stories in the last month from readers and followers on my social media about your challenge progress! :) Please keep in touch and let me know what you found easy to declutter and organise and which areas you found difficult to deal with. Today we are going to take the donation box(es) you should have accumulated over the last few weeks out of your home. You can sell the items you have decluttered, but I am going to focus on donating (it seems apt, especially as we have just finished the month of Ramadan)
Here is your challenge for today and possibly tomorrow (if the charities are not open today)
1. Gather the donation boxes and bags and put them in your car. (In future when you get a full donation box, drop it in your car straight away so you remove the clutter from your home and it is easy to remember to donate when it is in the car with you).
2. Take a picture of the donation boxes.
3. There are various charities and non-profit organisations you can contact to donate. A few of my favourite organisations in the UAE are:
a. Feline Friends – This non-profit will take your books to sell at Arte and other events. They also hold garage sells to sell items such as clothes and household items. All these events help to fund their TNR scheme for stray cats and other ventures.
b. Dar Al Ber (Women’s Section) – they are happy to take clothes and toys to help women and children who are being cared for by their team or are in need.
c. Take My Junk – This Ajman based company will take almost anything (but not big furniture items). The items go directly to underprivileged residents in the UAE or the proceeds benefit the labour camps. The service is free, but they do ask for a donation.
d. Bras For Social Crime – Juliana Kagugube runs Bras4SocialCrime (a non profit organisation) and takes old bras and gives them to women in rural Uganda for whom owning even one bra is a privilege.
e. Dubai Cares – If you have made some money from selling your items and want to donate the money, Dubai Cares is one charity worth donating to. They have special initiatives especially during Ramadan and provide various ways for you to donate to them.
f. Bin Kitty – Admittedly I have a soft spot for Bin Kitty and Feline Friends as my two cats were adopted from them. Bin Kitty, another non-profit organisation are always happy to take cash donations to help them pay for TNR schemes for strays. Also if you can help with donating food and space for the kitties that would help a lot (especially during the summer)
g. The Animal Project Dubai and UAQ – These non-profit organisations in Dubai and UAQ collect books, clothes and household items to sell at markets/fairs. The proceeds are used to educate and inform on community social responsibility for animals in Dubai and UAQ They also use the proceeds to provide discounted veterinary clinics rates, advertising and finding suitable permanent homes for their fostered rescued/unwanted pets.
If there are any charities you donate to currently, please let me know so I can spread the word on the Decluttr Me social media.
4. Upload your donation pile pictures on Twitter, Instagram or Facebook Decluttr Me page (tagging @decluttrme and using #21DaysOrganizationChallenge).
5. Have a nice cup of tea.
I hope that you have had fun whilst decluttering and organising your home. There will be new challenges in the next few months. To ensure you don't miss the next challenge, follow Decluttr Me by clicking on the buttons below.

For now take care and thank you for being part of the #21DaysOrganizationChallenge
Today is the penultimate challenge and the biggest one (which is why you have 2 days to complete it)!
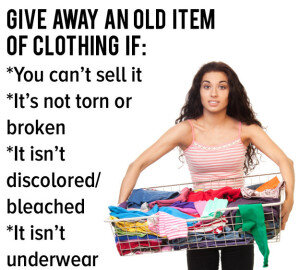
Now is a great time to freshen up your wardrobe and prepare for the colder (!) season arriving hopefully soon. Wardrobe space is precious and you shouldn't waste the space on items you don't wear.
Here is your challenge for today (and tomorrow) to declutter and organise your wardrobe:
1. Gather a few rubbish bags, boxes for donation, sell, and keep (1 for in season and 1 for out)
2. Take a before picture of the wardrobe space (or areas where your clothes are stored currently (including the bed, floor or chairs!).
3. Sort through everything in your wardrobe. Empty it completely and use these guides to divide the items into the above mentioned boxes:


4. Clean the cupboard where you will store all your linen.
5. Organise the items that you are keeping using this handy guide:

6. Put the "Winter" items in a Samla box such as this one and store at the top of your wardrobe.


7.Keep your donated items for Saturday's challenge.
8. Take a picture of the wardrobe after you have cleaned it. 9. Upload your before and after pictures on Twitter, Instagram or Facebook Decluttr Me page (tagging @decluttrme and using #21DaysOrganizationChallenge).
Can't wait to see how you have done.

This challenge should take 30 minutes to complete. Here it is:How often have you gone into a cupboard or the drawers under your bed and found old bed linen and towels? But when you need them you can never find them? Today we are going to streamline the linen into the essential items.
1. Take 1 rubbish bag and donation box.
2. Take a before picture the linen closet (if you have one).
3. Designate the linen (bed linen, towels, etc) into piles - Keep, Donate, Recycle/Rubbish.
4. Empty all the shelves, dividing the items into the 3 piles. (See day 21 for Donation)5. Clean the cupboard where you will store all your linen.6. Pare down the cupboard to the followinga. 3 towels and washclothes per personb. 2 sets of bed linenc. 1 set of towels and bed linen for each guest (of course if a couple use one set of bed linen for both).
7. Take a picture of the linen cupboard after you have cleaned it.
8. Upload your before and after pictures on Twitter, Instagram or Facebook Decluttr Me page (tagging @decluttrme and using #21DaysOrganizationChallenge).

Have fun!
Ok the likelihood of any car, including mine, being this beautifully pristine is limited but we have to aspire to reach a goal.
Having a messy car can be reflection of how your state of mind is currently. If your state of mind is messy, then imagine what your driving will be like and how stressed and anxious you will be. It is amazing what will happen to you peace of mind when you clear the mess.
The challenge will take 30 minutes but will be worth it. Here it is:
1. Take 2 trash bags, carrier bag, disinfectant wipes, vacuum cleaner or dustbuster.
2. Take a before picture of the inside of your car.
3. Throw away/put in the recycle bin all the empty water bottles, dirty tissues, take away bags, old receipts, and anything else that doesn't belong in the car.
4. Vacuum, wipe down the inside of the car with the wipes and clean the windows.5. I have a box in the boot of my car which stores all my work items, beach blanket, shopping bags and spare set of shoes.
6. Leave a carrier bag in the driver side door to use for rubbish.
7. Also create various kits such as: emergency kit, Kid Kit (toys, bin, wipes, etc) and little purse to store all your receipts. What other kits do you think you will need for your car?8. Take a picture of your car after you have cleaned it.
9. Upload your before and after pictures on Twitter, Instagram or Facebook Decluttr Me page (tagging @decluttrme and using #21DaysOrganizationChallenge).
Have fun!
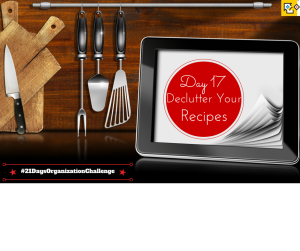
Do you have lots of cookbooks, printed recipes, recipe cards from supermarkets and cookery demonstrations and tear out of magazines? Are they lying in a pile on your kitchen counter ready to be organised?
Well today we are focusing on how to organise those recipes so that you keep the ones that you love and discard the rest.
Keeping all these bits and pieces organised is tough, but using one program you can ensure that all your favourite recipes are kept together in one safe place. If you are a regular reader you will know about my love of Evernote. It allows you to create notebooks for different parts of your life and syncs on all your devices. The program runs these items through their “recognition technology” to create search profiles and find key words.
You will need the following:
1. Download the Evernote App on your laptop and mobile phone.
2. Scanner
3. Recipes you have collected over time.
Here is the challenge for today:
1. Collect all the recipes and cookbooks
2. Take a before picture of all the documents.
3. Throw away/put in the recycle bin the recipes you will never make or didn't like when cooking them. Put the cookbooks you do use or like in a donate box.
4. Scan the recipes you love and will use again. Once scanned, put the cookbooks into the donate pile5. Create Folder called "Cookbook", "Recipes" or something similar.6. Save the each scanned recipe in a separate note - either attach the scanned recipe or copy & paste the scanned document onto the new note in Evernote. Add in the "tags" section key ingredients.7. If you love a lot of recipes in one cookbook, see if you can buy the digital version of it from Amazon or Apple Books.
8. If you are not digitally inclined, you can create a recipe binder:a. Get a nice colour A4 binder (I love the ones in Paperchase).b. Use colourful dividers and label each divider into different categories such as "Starters", "Desserts", "Chicken", "Vegetarian", "Indian", "Chinese", etc.c. Put in the recipes.d. Review the file every few months. If you make a dish, and the family aren't keen on it, throw it away immediately.
9. If you store recipes in a binder, take an after picture.
10. Upload your before and after picture on Twitter, Instagram or Facebook Decluttr Me page (tagging @decluttrme and using #21DaysOrganizationChallenge).

Today let's focus on all those manuals you receive for the tv, printer, kitchen blender (!!) and even your hard drive.
Do you throw them into your junk drawer or on your table as soon as you receive them? How many of them do you actually need to keep? Nowadays, you can download the manuals for the item from the manufacturer's website. Today we are going to be decluttering primarily those manuals for all your electrical items (there is very little organising today! :)). Here is the challenge:
1. Collect all the manuals stored around your home.
2. Take a before picture of all these manuals.
3. Throw away/put in the recycle bin the manuals if they fit this description: you no longer own the item, you know how to use the electrical item or the manual is in a language you cannot read.
4. Search online for the manuals you have retained.5. If you find the manual online, download the manual and save it in a Folder called "Home Electronics Manuals" or something similar.6. If you find the online manual, throw away the paper manual.7. If you are unable to locate the downloadable manual, store the paper manuals (you can file them alphabetically based on electrical item or by manufacturer) in a box file. Here is an example of a colourful way to store your manuals.


I don't know about you but I seem to have accumulated a lot of jewellery boxes over the last few decades, as well as necklace hangers and ring holders. There are multiple ways to store your jewellery, but how often do you go through your items and take stock of your inventory?
Today your task may involve detangling a few necklaces, but you will also get to see how many earrings have gone missing.
1. Take a before picture of all your jewellery and how it is stored currently whether on dressing today, bedside cabinet, bathroom or even on the floor.
2. Take the jewellery from all the areas and put it all in one area to review (I usually like sitting on my bed with an old newspaper on top of the duvet.
3. Throw away anything that is broken, too old, never worn and worn out (especially relevant with the cheap jewellery which goes from silver to bronze in short time).4. With regards to the 1 earrings, put them in one place for now to review at the end.
5. Clean the area where you will be storing the make-up
6. Use jewellery boxes which you have accumulated over the years, or buy news ones from Ikea, Splash or clothes stores such as H&M. I hang my necklaces using a necklace hanger bought from Marks & Spencer, which is similar to the one below:

I am a fan of this jewellery organiser which can be bough on Amazon or at The One.

Check out how Ikea candle holders have been used to hang drop earrings. A great way to see your earrings in the morning.

7. Throw away or donate any unused, unwanted jewellery boxes
8. Take your after picture or video showing organised make-up.9. Upload your before and after picture/video on Twitter, Instagram or Facebook Decluttr Me page (tagging @decluttrme and using #21DaysOrganizationChallenge).
All your photos will be added to the 21 Days Organization Challenge page over this month!
I recently re-organised my jewellery and filmed a video which you can see by clicking on the link here.
Let me know how you do with your organising challenge today (and how many necklaces your untangled!).

Only a few more days left! How has the challenge been for you so far?
Today we are focusing on my favourite area to declutter and organize - The Pantry. Whether you have a separate room, or a few cupboards in your kitchen, we all have a Pantry to store dry foods.How often do you or your maids go through the pantry and discard items that have passed their sell by date, or items that have never been used such as oils, vinegars and pastas. Getting rid of these old items will stop items falling down on you when you open the cupboards or shelves, and enable you to store the items that you want to keep and use.
I have saved this challenge for today so you have Thursday and Friday to declutter and organise it (if needed). Here is your declutter challenge for your weekend:
1. Take a before picture of the Pantry area.
2. Empty the entire pantry. Yep, all of it.
3. Wipe it clean using cleaner and mop the floor. If need be remove the shelving from the room to enable you to do a good clean.4. Take a rubbish bag and start throwing away the items of food that is out of date or never eaten/used.5. Store like for like items such as Oils and Vinegars, Canned Vegetables, Condiments (Mustard, Chilli Sauce, Mayonnaise), Pastas, Pulses, Tomato, etc in boxes and jars.I tend to store pasta, pulses, spices and flour in airtight jars which are then labelled with their sell by dates.6. Label all the boxes and jars using your label machine.7. Have fun organising the area into a logical system.
8. Take your after picture of your organised winter clothes.
9. Upload your before and after picture on Twitter, Instagram or Facebook Decluttr Me page (tagging @decluttrme and using #21DaysOrganizationChallenge).
All your photos will be added to the 21 Days Organization Challenge page over this month!


Check out some of the pantries I have organised recently for inspiration
For a few brief months (around 3) we get to enjoy the cold here in Middle East. This means the jumpers, cardigans, velour tracksuits and even jackets can come out in all their glory. I even own a few coats which come out for my winter holidays back to Europe!
But what do you do with these clothing items once the summer has returned and you no longer book the holidays to winter climates? Most people just leave them in your wardrobe, which takes up valuable space. My challenge today is to help you store those winter clothes neatly and reclaim the space in your wardrobe. Here is your declutter challenge for you:
1. Take a before picture of your winter clothes.
2. Go through the clothes and put them into three piles: donate, sell or keep. Add the donated clothes to your donate box (we will be dealing with them in a few days). If any of the items are of high value, you can sell them on Melltoo, Facebook second hand pages, second clothes shops or at the Flea Market.
3. Fold the winter clothes and store them in an airtight bag or box. Storing them in an airtight bag or box will ensure that there is less chance of them being eaten by the moths.I have stored all my woolies into a big Samla box and stored it in the upper level of my wardrobe.
One cardigan has been left in my wardrobe in case I need to travel anywhere outside of the country or if it suddenly becomes cold.
The shawls and pashminas have a separate location. They are always needed when we go to air conditioned restaurants, bars or malls.
4. Store the boxes or bags at the top of your wardrobe, in a store room or another designated space which you do not need to access often.
5. Take your after picture of your organised winter clothes.
6. Upload your before and after picture on Twitter, Instagram or Facebook Decluttr Me page (tagging @decluttrme and using #21DaysOrganizationChallenge).
All your photos will be added to this page over this month!

Can't wait to see how your bookshelf looks!-----------------------------------------------------------------------------------------------------------------------------------------------------------------------------------------------------------------------------------------------
Make-Up is needed but it can escalate to un-storable volumes if not organised properly. I recently re-organised my make-up and filmed a video for you, to check out how I organised all it, into a simple organised system.
If you were inspired by the video, this challenge will be great for you! Here it is:
1. Take a before picture of all your make-up and how it is stored currently whether on the bathroom counter, in baskets or even on the floor.
2. Take the make-up from all the areas and put it all in one area to review (the bathroom floor is an ideal location).
3. Throw away anything that is broken, finished, too old or never worn?Use this chart to determine how long you should be keeping your make-up.

Put all empty MAC containers in an empty carrier bag and then take it to MAC when you are next in the mall. You can get a few lipstick for every 6 empty MAC containers given back.
4. Clean the area where you will be storing the make-up
5. The storage boxes I used were from Ikea. If you use the same boxes, put each type of make-up in the different boxes and then label each box.
6. Take your after picture or video showing organised make-up.
7. Upload your before and after picture on Twitter, Instagram or Facebook Decluttr Me page (tagging @decluttrme and using #21DaysOrganizationChallenge).All your photos will be added to the 21 Days Organization Challenge page over this month!
Can't wait to see how you do!

How often do you open your cupboard where the cleaning products are stored and start rummaging through the pile wondering what the products are supposed to be used for?
How many half empty containers do you have of useless products?
Does your maid use the wrong product when cleaning as she is just picking up the first one she can get hold of?
If you feel overburden with cleaning products clutter, this challenge is ideal for you (and your maid). We will be helping you to get rid of those products and narrow down to 5 key products. Are you ready?
Here is the challenge for today:
1. Take a before picture of the cupboard where you store all your products.
2. Empty all the contents onto the counter or your floor.
3. Throw out all the items that are broken, not used, half empty (and never going to be emptied) or not practical.
4. Clean the area where you will store the products. I use disinfectant wipes to clean away all the debris and leaked liquids in the area.
5. Get a medium sized plastic container like the one in the picture above. I bought my container from Carrefour but you can purchase plastic boxes from other supermarkets, Ikea, Clas Ohlson or Lakeland. The box does not need to be fancy, but should be big enough to hold all the cleaning bottles as well as dust rags and sponges.
6. Put the following products in the container a. All Purpose Cleaner - Dettol have a great product which kills all germs and has no awful fragrance. b. Glass Cleaner c. Wood Polish d. Abrasive Cleaner for the Bathroom and Kitchen (I still use JIF after all these years) e. Floor Cleaner
I have not included toilet disinfectant, washing up liquid and laundry detergent as they are stored in a designated area always (by your sink, washing machine or toilet).
I have wanted to try the Ecover range which is sold in the Change Initiative for some time. Once my latest stock of cleaning products finish, I will be trying them out and seeing if they do the job!
7. Take your after picture of your decluttered basket of cleaning products.
8. Upload your before and after picture on Twitter, Instagram or Facebook Decluttr Me page (tagging @decluttrme and using #21DaysOrganizationChallenge).
All your photos will be added to the 21 Days Organization Challenge page over this month!
Let me know how you do with organising your products!

150712 Day 10 Book Declutter
Even in this age of kindles and iBooks, its still nice to have books to hold and read. However, once you have read the book do you add it to the pile on your bookshelf, floor or table?
Here is your declutter challenge for you to get some room back on those shelves:
1. Take a before picture of your bookshelf and books (if can't fit on the shelves).
2. Go through your book collection
3. Keep the ones you can’t part with – one book I will always keep is a Suitable Boy by Vikram Seth, which is in a beautiful box set. I love reading it every year and can never part with it even when moving around the world.
4. Put the other books in your donations box or put aside to sell.
Try selling them on eBay or Amazon. Also there are animal charities that take books to sell at flea markets.
5. Place the books you want to keep back on the bookshelf. Why not colour co-ordinate the books onto your shelves to create a rainbow bookshelf. Other ideas for displaying your books can be found on Pinterest.
6. Take your after picture of your decluttered basket of cleaning products.
7. Upload your before and after picture onTwitter, Instagram or FacebookDecluttr Me page (tagging @decluttrme and using #21DaysOrganizationChallenge).
All your photos will be added to this page over the month!
Can't wait to see how your bookshelf looks!

Wonder how to clear your email inbox daily and keep it clear?
Here are some simple tips to help you with your challenge today.
1. When the email comes ask yourself “do I have to do something?”.
2. If no, delete or file the email into a specific folder.
3. If yes, you can either do one of the following:
a. Do – Follow the 2 minute rule. If you can complete the task or respond in 2 minutes, do it now.
b. Delegate – Forward the email to someone who is better equipped to deal with it.
c. Defer – Add the email to your to-do list or flag the email with an alarm, so that you can deal with it at a set time later.
Start using these rules today and let me know if they help you clear your inbox.
Show us how you have reduced your inbox, upload your before and after picture on Twitter, Instagram or Facebook Decluttr Me page (tagging @decluttrme and using #21DaysOrganizationChallenge).

We all have that drawer that is used to hold the junk items that can’t be stored elsewhere or we never have time to store in the right place. It’s always a disorganised mess, but today's challenge will help you declutter and organise it:
1. Take a before picture of the junk drawer.
2. Empty all the contents onto a table or your floor.
3. Throw out all the items that are broken, not used, and empty pen lids (there always seems to be a lot of them in these drawers). All receipts and pieces of paper with writing should be shredded.
4. Put away items that have a designated place in your home or office.
5. Clean the drawer. I use disinfectant wipes to clean away all the germs that might have accumulated in the drawer.
6. Create a place for grouped items using boxes, pot holders, or drawer dividers.
I have found excellent drawer dividers in Muji and Daiso. Also there are some great drawer dividers and storage units to put in the drawers from Ikea. Here are some examples:


To keep the boxes in place, put velcro circles on the bottom

9. Take your after picture of the decluttered junk drawer.
10. Upload your before and after picture on Twitter, Instagram or Facebook Decluttr Me page (tagging @decluttrme and using #21DaysOrganizationChallenge).
All your photos will be added to this page over this month!
Can't wait to see how you do!

Magazine clutter seems to be an epidemic in the UAE in most households I visit. They seem to be everywhere – the living room, bedroom, bathroom, guest bathroom and even in the kitchen.
When I ask clients why they keep the magazines the answers are usually:
a. I want to tear our some important articles and images to create a mood board or scrap book
b. I wrote an article in these magazines.
c. It has useful information that might come handy one day.
Do these reasons sound familiar to you? If you leave the magazines lying around, collecting dust and not being used, you create inertia and stagnant energy in the room. The magazines act like a wall blocking the energy within it. It’s not healthy.
Today's challenge is to get rid of this magazine blocked energy and remove the build of dust and clutter:
1. Take a before picture of the magazines.
2. How long have you kept magazines waiting to create your mood board? Why not start an account with Pinterest and create online mood boards to look at any time on your computer or phone? I have various mood boards on Pinterest from decluttering, interior design, travel and cherry blossom (I love them) – you can check them out here and be inspired for your boards on the site.
3. If you wrote an article in the magazine, can you access the article online or get a pdf of it from the publisher? Every time I am published, I request for the article in pdf to save in a specially labelled online folder. I also request for the website link so I can refer to the article in a blog. This means I save paper and clutter in my home.
4. Could the useful information you found in the magazine be found online? I’m guessing most probably, yes. Why not create a notebook in your Evernote account for links with handy tips so you can refer to at any time?
5. The magazines do not have to be thrown in the recycle bin; give them to workers and maids who will enjoy reading the articles and passing them to their friends and colleagues. I am sure they will appreciate receiving them even if they are back issues. Back home in England, I used to drop my old magazines at my GP Surgery so that the sick patients could read InStyle and Empire whilst they waited to see the doctor.
6. Put any magazines that are too old and dusty into the recycle bin.
7. Moving forward, download the magazine onto your tablet or computer. If you wait a month, they are discounted and you reduce the physical clutter around you
8. Clean the areas where the magazines were piled up with disinfectant and furniture spray (if necessary).
9. Take your after picture decluttered magazine area.
10. Upload your before and after picture on Twitter, Instagram or Facebook Decluttr Me page (tagging @decluttrme and using #21DaysOrganizationChallenge).
All your photos will be added to this page over this month!
------------------------------------------------------------------------------------------------------------------------------------------------------------------------------------------------------------------------------------------------

Crockery is a big kitchen invader and can be worse if you never get rid of those solo plates, bowls and glasses and keep buying new sets. If you look in your cupboard right now, how many odd pieces of crockery will you find.
If you found some, then today's challenge will be uplifting for you! Here it is:
1. Take a before picture of the cupboards with the crockery.
2. Take out the crockery from each area. Start with plates and bowls and do the below, then use the same process to do the glasses, etc.
3. Throw away anything that is broken and put in a donate box any crockery items that you do not use, are the last ones left standing or are just horrible to use. It may have been expensive, but if it has not been used, why take up the cupboard space?
4. Clean the cupboard using disinfectant wipes or cleaning products.
5. Put all the crockery which you use on a daily basis together in one cupboard. If you have more cupboard space, put the Fine China or Special Use crockery in this second cupboard.
Make sure you put the crockery in cupboards away from the cooker. The cupboard near the cooker should contain your spices, condiments, cooking utensils and daily pantry items.
6. Take your after picture showing your organised crockery.
7. Upload your before and after picture on Twitter, Instagram or Facebook Decluttr Me page (tagging @decluttrme and using #21DaysOrganizationChallenge). Here are some photos of how I have organised crockery for clients to inspire you (all of the crockery items were in random other cupboards before):
The Glassware

The Fine Dining

Anyone for Tea?

All your photos will be added to the 21 Days Organization Challenge page over this month!
Can't wait to see how you do!

I don't know about you but i find that my bathroom cupboard is always accumulating lots of bottles, jars and boxes of stuff all the time. Even though I buy only one item, there always seems to be a lot of things are under the sink.
To alleviate the problem, I bought some small plastic boxes from Clas Ohlson and organised the area into 4 areas: 1. Hair products (top left ) 2. Sanitary pads/tampons/panty liners (top right) 3. Shower gel, oil, and other toiletries (bottom left) 4. Cleaning products (bottom right) By using these boxes I have organised where all items should be stored and it is easy for the maid to find the cleaning products quickly. Here are is my challenge for the day for you to clear your bathroom sink cupboard:
1. Take a before picture.
2. Take out all toiletries and items in the cupboard
3. Throw away anything that is old, expired or never/hardly used. It may have been expensive, but if it has not been used, why take up the cupboard space? 4. Clean the cupboard using disinfectant wipes.
5. Use small containers and arrange them so they are easy to reach and fill up. If you have a shelf which makes the area cumbersome, remove it. I removed mine and it is now much each to store and collect items from this cupboard. If you use containers, label each one.
6. Fill up the boxes in a logical way - Hair products in one box, Toiletries in another, Ladies products in one box, etc.
7. Take your after picture showing organised bathroom cupboard.
8. Upload your before and after picture on Twitter, Instagram or Facebook Decluttr Me page (tagging @decluttrme and using #21DaysOrganizationChallenge).
All your photos will be added to this page over the month!
Can't wait to see how you do!
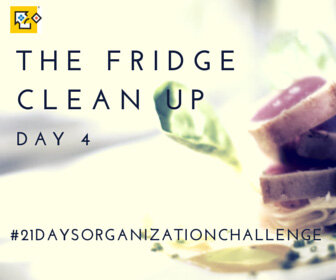
We may use the fridge every day, but how often do you clean it? When did you last check the expiry date on that jar of olives?
Here are my tips to clean it up and your challenge for the day:
1. Take a before picture.
2. Take out all of the food and anything else from the fridge.
3. Throw away anything that looks like it might affect a country with their bacteria or has expired.
4. Clean the fridge - I started by gathering all the crumbs with a dustpan and brush, then i used hot water and lemon scented washing up liquid to clean the inside. You can also use anti bacterial wipes to get into those hard to reach areas.5. Fill the fridge back up, but make sure you put like for like items together. As you can see in the video below, I used containers to put the same items together. The containers were from the brilliant Daiso. The warmest part of the fridge is the door, so do not put dairy products in the door if possible.
6. If you use containers, label each one.
7. Take your after picture showing your sparkly clean fridge.
8. Upload your before and after picture on Twitter, Instagram or Facebook Decluttr Me page (tagging @decluttrme and using #21DaysOrganizationChallenge).
All your photos will be added to this page during the month!
Can't wait to see your clean and organised fridge!
------------------------------------------------------------------------------------------------------------------------------------------------------------------------------------------------------------------------------------------------
Day 3 - Organizing Your Photos

Do you have photos in boxes and albums everywhere around the home. Are there photos hidden in attics back in your home country? Lost at what to do with the paper ones?
Today we are going to work on those photos :). Your challenge is as follows:
1. Take out all of your photos from everywhere - look in all your drawers, closets, boxes, etc.
2. Find a space to lay them out. My comfy rug was ideal for this task.
3. Take a before picture.
4. Organise the photos into year and put them in each box. Next task at a later date is to organise those photos in each box chronologically. If you find duplicates or photos with errors shred or throw them away. Love any of those photos? Find the empty frames in your home and put the photos in them straight away.
5. Label each box (I used old shoe boxes) by year (if you have taken a lot of photos) or group of years or by the event (say holiday to Maldives 2014). I figured out that i needed boxes for years up to 2005 as I went digital after then.
6. Label your containers (I have a brother label machine). You can buy the machines from supermarkets and stationary stores.
7. Take your after picture showing the boxes you used and labels to organise to the photos.
8. Upload your before and after picture on Twitter, Instagram or Facebook Decluttr Me page (tagging @decluttrme and using #21DaysOrganizationChallenge).
All your photos will be added here over this month!
Can't wait to see your organised photos!

Are your spices in packets (which then fall on the counter and floor) or do you choose the wrong spice when cooking as it is not labelled correctly.
My challenge today to help you clear the spices is as follows:1. Take a before picture (this is important so you can see the difference after you have finished the challenge).2. Take everything out from the cupboard.3. Throw out all the expired spices (and ones with bugs in them).4. Wipe the cupboard with a disinfectant wipe.
5. Store your spices in jars (the ones used in the picture above are from Ikea).
I put non essential herbs and spices in this spice rack bought from Crate & Barrel

The main spices I use on a weekly basis are put in bigger containers and stored next to my cooker.

6. Label your containers (I have a brother label machine). You can buy the machines from supermarkets and stationary stores.
7. Take your after picture.
8. Upload your before and after picture on Twitter, Instagram or Facebook Decluttr Me page (tagging @decluttrme and using #21DaysOrganizationChallenge).
All your photos will be added to this page during the month!
Can't wait to see how spicy you get!

Is your cupboard full of medicine? Did your doctor over prescribe you again this flu season? If yes, then it will be time to declutter and organise it. My challenge for today is as follows:1. Take a before picture (this is important so you can see the difference after you have finished the challenge).2. Take everything out from wherever you put the medicine and vitamins.3. Throw out all the expired medicine and vitamins.If your pharmacy will accept expired medicine and vitamins, give it to them. (Unfortunately I believe this practice was stopped by pharmacies in the UAE again this year). If you must dispose the medicine in the trash please do it carefully to protect children and animals. 4. Wipe the cupboard, box, etc with a disinfectant wipe. 5. Categorise your medicines and vitamins into sub-categories. For this task I categorised into cough/flu medicine, plasters and bandages, stomach relief, disinfectants, vitamins and minerals, etc.6. Label your containers (these containers are from Clas Ohlson, but you can also get awesome ones from Daiso).7. Take your after picture.8. Upload your before and after picture on Twitter, Instagram or Facebook
Decluttr Me page (tagging @decluttrme and using #21DaysOrganizationChallenge). All your photos will be added to this page over this month!Can't wait to see your medicine cabinet!
© 2013-15 Decluttr Me | All rights reserved - This post is provided for the convenience of Decluttr Me readers. Any reproduction of the content within this feed is strictly prohibited.